
You can fix areas of wood rot, and today’s post will show you how. Areas that most commonly get wood rot around the house include window and door trims, especially on exterior trim. But you don’t necessarily have to get rid of all the trim and start over. If the area is not too large, it may be salvageable. Here’s how!
Tools & Materials
sanding block & sandpaper {100 grit}
paintbrush
To prep the wood for repair, thoroughly remove all the rotted areas with a sharp tool such as a 5-in-1 tool or a wire brush. Remove any debris so that the area is clean {and dry}.
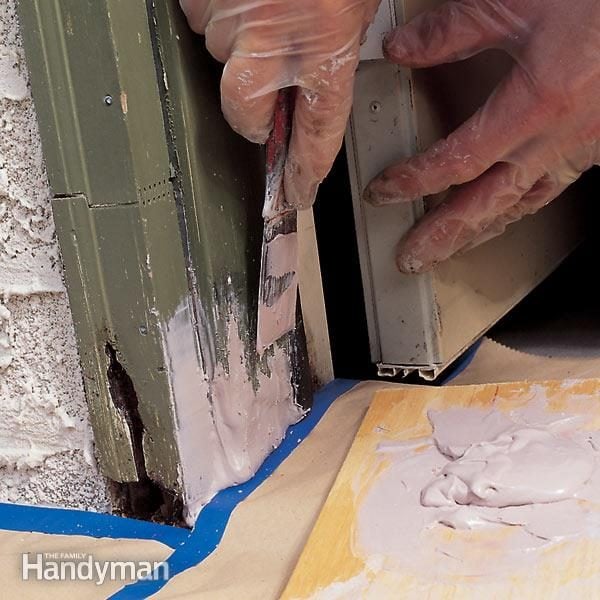
Now apply wood hardener to the newly cleaned area. Be sure to coat all the raw wood well with hardener. Once the wood is coated, use a putty knife to apply polyester filler. Press the filler into all the holes left by removing the rotted wood.

If you’re making vertical repairs, you will probably experience some sagging of the filler before it fully hardens. If this is the case, you need to carve and shape the filler while it is partially hardened. If necessary, apply another layer of polyester filler. You can also use two-part resin to repair wood rot, but the shaping and sculpting step is the same.

Once the polyester filler {or resin} has hardened, you need to sand it smooth. At This Old House, the recommendation is to sand using 80-grit sandpaper first. Then sand with 100-grit and finish it off with 220-grit. At this point you should have a completely blended and smooth repair. Note that resin needs to be painted after sanding to protect it from the damage caused by sunlight. Coat it first with acrylic primer, and then finish it with two coats of 100-percent acrylic paint.


Leave a Reply